
Master Sugar Cookie Decorating Techniques
- Sheila Sonnenfeld
- Nov 24, 2025
- 4 min read
If you’ve ever found yourself mesmerized by those perfectly iced, beautifully detailed sugar cookies, you’re not alone! I’m here to share the secrets and joy of sugar cookie decorating, turning your kitchen into a mini cookie art studio. Whether you’re a beginner or a seasoned cookie enthusiast, mastering these techniques will have you creating edible masterpieces that wow every time. So, grab your piping bags and let’s dive into the sweet world of cookie art classes!
Why Cookie Art Classes Are a Game-Changer
Let’s be honest - sugar cookie decorating looks easy when you watch the pros, but it’s a whole different story when you try it yourself. That’s where cookie art classes come in. They’re like a backstage pass to the cookie decorating concert, giving you hands-on experience, insider tips, and a chance to ask all those burning questions.
In these classes, you’ll learn:
How to make the perfect royal icing consistency (the holy grail of cookie decorating)
Piping techniques that make your designs pop
Color mixing tips to get those vibrant hues
How to fix common mistakes without losing your cool
Plus, it’s a blast! You get to meet fellow cookie lovers, share laughs, and leave with cookies that look as good as they taste. If you want to take your skills to the next level, I highly recommend checking out sugar cookie decorating classes that offer personalized guidance and fun projects.

Essential Tools and Ingredients for Cookie Decorating Success
Before you start piping away, let’s talk about the tools and ingredients that make all the difference. Having the right gear is like having a magic wand in your hand!
Must-Have Tools:
Piping bags and tips: Start with a few basic tips like round, star, and leaf. These cover most designs.
Scribe tool or toothpick: Perfect for fixing tiny mistakes or creating marbled effects.
Couplers: These let you switch tips without changing bags - a real time saver.
Food coloring gels: They give you vibrant colors without watering down your icing.
Cookie cutters: Choose shapes that inspire you - from classic circles to fun seasonal themes.
Ingredients:
Sugar cookie dough: A sturdy dough that holds its shape is key. I love recipes with a hint of vanilla and a buttery finish.
Royal icing: Made from powdered sugar, meringue powder, and water, this icing dries hard and smooth - perfect for detailed work.
Pro tip: Always test your icing consistency before decorating. Too runny and it’ll spread everywhere; too thick and it won’t pipe smoothly. Aim for a consistency that flows like honey but holds its shape.
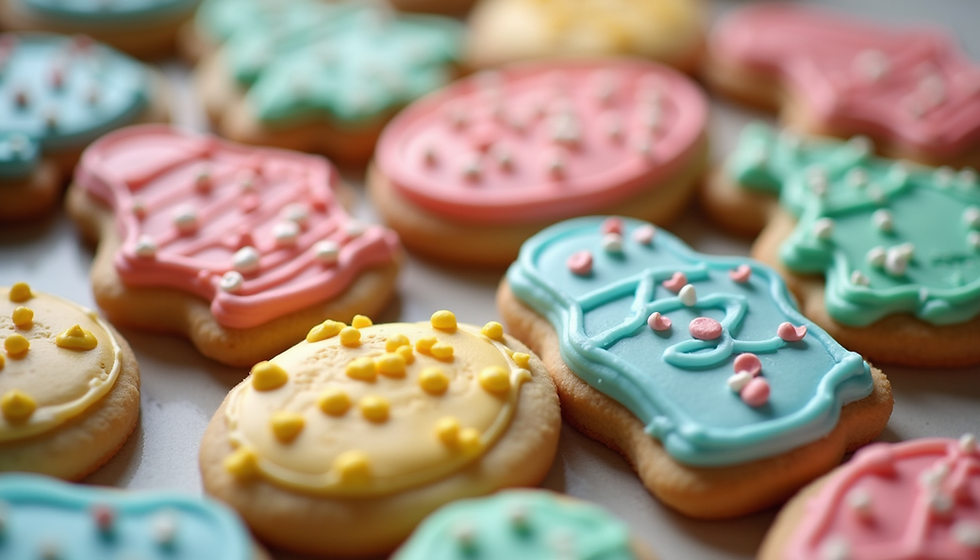
Step-by-Step Sugar Cookie Decorating Techniques
Now, the fun part! Let’s break down some decorating techniques that will make your cookies stand out.
1. Outlining and Flooding
This is the foundation of most decorated cookies. Start by outlining your cookie with a thicker icing to create a barrier. Then, flood the inside with a thinner icing to fill the space smoothly.
Use a piping bag fitted with a small round tip for outlining.
Thin your icing with a few drops of water until it flows easily.
Use a toothpick to spread the icing evenly and pop any air bubbles.
2. Wet-on-Wet Designs
Want to add polka dots, stripes, or hearts? Wet-on-wet is your friend. While the flooded icing is still wet, pipe smaller shapes or lines on top. They’ll sink in and create a smooth, seamless look.
3. Piping Details
Once your base layer dries, add details like borders, faces, or lettering with thicker icing. This is where your piping skills shine!
Hold your piping bag at a 45-degree angle.
Use steady pressure and slow movements.
Practice on parchment paper before decorating your cookies.
4. Adding Texture
For a little extra flair, try these:
Brush embroidery: Use a damp brush to pull icing inward, creating a delicate lace effect.
Stenciling: Place a stencil over your cookie and dust with powdered sugar or cocoa.
Sprinkles and edible glitter: Add these while the icing is still tacky for sparkle and crunch.

Tips for Perfecting Your Cookie Decorating Skills
Like any art, practice makes perfect. Here are some tips I’ve picked up along the way to keep your cookie decorating journey joyful and successful:
Start simple: Don’t overwhelm yourself with complicated designs at first. Master the basics and build up.
Use quality ingredients: Fresh, good-quality ingredients make a noticeable difference in taste and texture.
Keep your workspace clean: A tidy area helps you focus and avoid icing mishaps.
Be patient: Let each layer dry completely before adding the next to avoid smudging.
Experiment with colors: Don’t be afraid to mix your own shades. It’s like painting with icing!
Watch tutorials and join classes: Sometimes seeing techniques in action is the best way to learn.
If you’re in Visalia or Tulare County and want to dive deeper, local cookie art classes offer a fantastic way to learn in a fun, supportive environment.
Bringing Your Cookie Creations to Life for Any Event
One of the best parts of mastering sugar cookie decorating is the ability to customize cookies for any occasion. Birthdays, weddings, baby showers, corporate events - you name it, cookies can be tailored to fit the theme perfectly.
Here’s how to make your cookies event-ready:
Plan your design: Sketch your ideas or gather inspiration photos.
Choose colors that match the event palette.
Add personalized touches: Names, dates, or logos.
Package with care: Use clear boxes or decorative bags to showcase your work.
Custom sugar cookies are not just treats; they’re conversation starters and memorable keepsakes. If you want to impress your guests or clients, beautifully decorated cookies are a sweet way to do it.
I hope this sweet journey into sugar cookie decorating has inspired you to pick up that piping bag and start creating! Remember, every cookie is a little canvas, and with the right techniques and a sprinkle of patience, you can turn simple sugar cookies into stunning works of art. And if you want to learn alongside others and get expert tips, don’t forget to explore sugar cookie decorating classes near you. Happy decorating! 🍪✨


Comments